Why is "Service Host: Local System" consuming too much network bandwidth?
Well, Service Host: Local System is bundle of System Processes which operates automatically through system. It includes processes including Windows Auto Update & many others which takes up huge disk, memory, RAM & even Network i.e., Internet Data. You may have noticed that almost all your available network is taken by this Processes. This problem is frequent in Windows 8 & 10.
To avoid, there are few solutions available which are little longer which can help you solve this issue temporary or even permanently.
Solutions will help you stop Service Host Local System from eating away all your available resources such as RAM, Memory & Network which will enhance your System Performance to great extent.
Hope these provided solutions works for you.
Service Host Local System
Service Host: Local System Using Up All Your Resources? – Here are All the Working Solutions!! Try them & fix Service Host Local System Issue!!
If you are running Windows System, then you might be facing this Specific Issues of Service Host Local System which is System inbuilt Program which operates certain tasks that are scheduled automatically by System such as Updating Windows regularly, Making New Changes, etc. So it starts its job without letting us know and consumes lots of our Internet Data & Takes up almost all the available resources, i.e., RAM & Memory. Nearly every Windows Users frequently face this issue.
Table of Contents [Show]
Update: Added New Special Solution (Solution 4) to Permanently Disable Service Host Local System. Check it out!
What is “Service Host: Local System” & What are its Effects?
Service Host Local System is a System Service Program built to perform few numbers of System Scheduled Tasks Automatically. It is a combination of lots of sub-tasks which starts simultaneously and takes away lots of Computer Resources Like RAM, Memory & even Internet Data. This tasks even includes Updating Windows Regularly & you know Updating Windows requires Internet Connection, and it downloads huge files from the Internet.
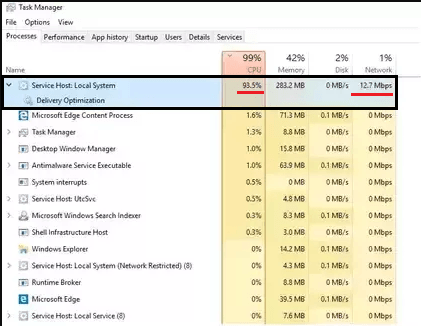
The above image shows How much Resource does Service Host: Local System takes away from your available resources. You can see, the numbers are huge. That process almost uses CPU, and Network usage is 12.7 Mbps, it’s too much, isn’t it?? So we need to fix this up or Disable Service Host Local System Process completely.
To avoid Service Host Local System to take up your resources, you can follow our different working solutions added below. Well, there are no direct available solutions, but we dig deeper into the issue and found few working depth solutions. We can get rid of Service Host Local System startup problems permanently. Service host local system high diskusage & service host local system high CPU usage are the main issues which we can solve through the given solutions.
So we have a bunch of working solutions to stop Service Host Local System from Eating up Computer Resources including your Internet Data! Try out this Solutions & almost all the Solutions are working. So you can apply this all the solutions and remain unaffected by Service Host Local System.
Available Working Solutions to Service Host Local System Problem:
Solution 1 – Directly Disabling Service Host Local System Tasks
Solution 2 – Disabling Background Intelligent Transfer Service
Solution 3 – Enabling your Network as Metered Connection
Solution 4 – [NEW] Permanently Disabling Windows Update to Stop Service Host Local System
So let’s start with the solution one by one. Hope these solutions will Solve your Issues with Service Host: Local System.
Solution 1: Disable Service Host Local System Tasks Directly
Here we have the first Working Solution to Service Host Local System issues. You can easily get rid of this problem but not permanently. So this solution will help you to disable Service Host Local System and its Tasks temporarily. Meaning is this will not permanently solve as we are just disabling it for a while, this may restart when you reboot the system. Still, this is Effective Solution for Quick Effects. Let’s do it, here are easy steps:
1. Open Windows Task Manager. (Press Win+R & type taskmgr and press Enter).
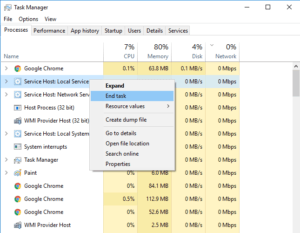
2. Task Manager Window will Pop up. In Processes tab, you will see all the currently running Processes in Computer. Just Scroll Down & Find out Service Host: Local System Process from the List.
3. Just Right Click on Service Host: Local System Process & Select End task option.
4. A new window will popup asking the confirmation to End the Task. Just select (tick mark) on Abandon unsaved data and shutdown & click on Shut down button.
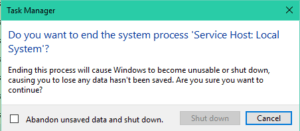
5. That’s it. You just stopped Service Host: Local System process from eating away your resources.
Now you have your resources available, finish up your work. For permanent solutions to Service Host: Local System problem, you can try other solutions added below.
Solution 2: Disable Background Intelligent Transfer Service
Service Host Local System also includes tasks like Windows Auto Update, and it uses lots of Internet Data along with Resources. You can disable this function permanently by Disabling Background Intelligent Transfer Service. It will save your lots of Internet Data or Network & will also free-up memory & other resources. Let’s try out this solution, here are easy steps:
1. Open Windows Task Manager. (Press Win+R & type taskmgr & press Enter).
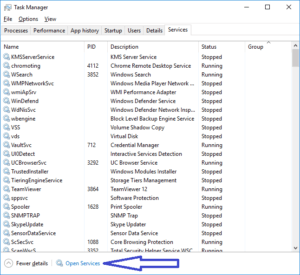
2. Task Manager Window will Pop up. Switch to Services tab (extreme last tab).
On the same screen, at the bottom, you will find Open Services button. Just click on it.
3. A new Window will open up with a huge list of all the Services. Just find out the Service with the name as Background Intelligent Transfer Service.
Right Click on Background Intelligent Transfer Service & click Stop option.
The Service will Stop in few seconds. Windows Auto Update Service is Stopped now means your Internet Data is now not used by this Service. You saved Computer Resources and Network Data using this Solution. This solution works efficiently, and you don’t need any further optimizations as of now. If in future any update comes then we will update it here. Stay tuned!! Now check and try out the solution number 3 which may result very helpful.
Solution 3: Set your Network as Metered Connection
If you find that “Service Host: Local System” is using too much of your Internet Data or too much of Network then you can try out this solution, it works perfectly. This solution will also help you save Internet Data if you are on Slow or Cellular Network or even if you are on Limited Plan Ethernet Connection. Enabling Metered Connection to your Network will Stop all other automatic services which use your Internet Data. The Processes that you do will only be allowed to use your Internet data this means that no services including Service Host Local System will be able to consume or take up your Internet Data and hence also saving Resources. So let’s try out this solution, here are easy steps.
Steps to Set your Internet Connection as Metered Connection:
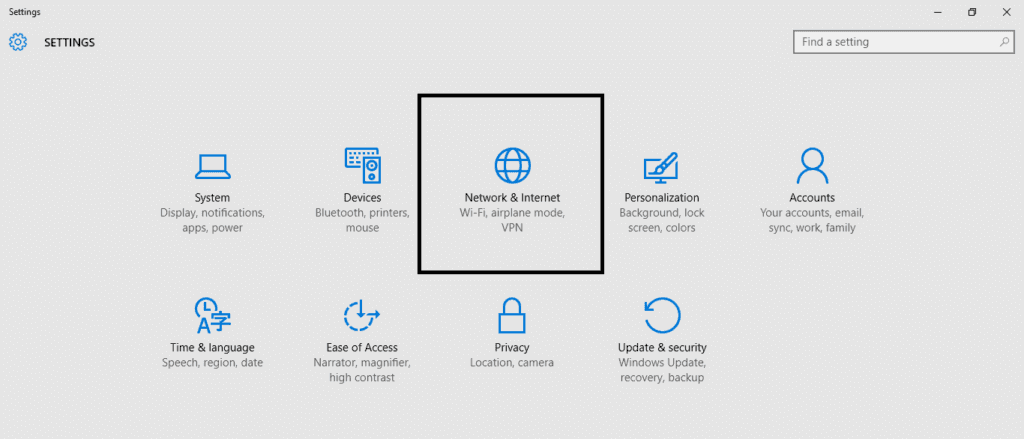
1. Open Settings. To open Settings, you can press Windows Button & click on Settings Option.
2. Then click on Network & Internet option.
3. In Wi-Fi settings Screen, you will find Advanced options. Click on it.
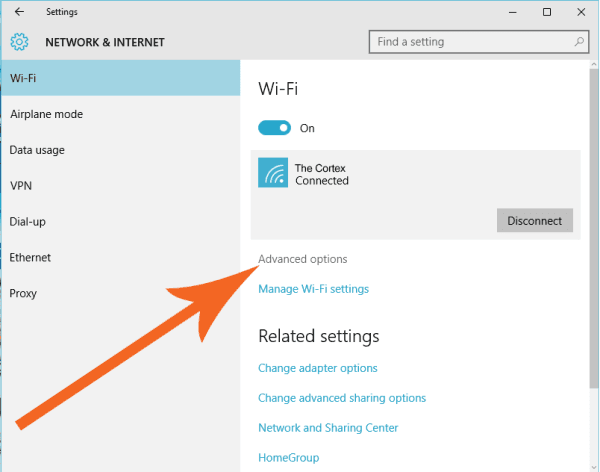
4. Now on the Settings Screen, Turn On (tick mark) Set as metered connection option.
That’s it, your Network is now on Metered Connection means its usage is limited to the Real-Time Processes only. If you are using Ethernet then follow the given below steps to set your Ethernet Connection to Metered Connection.
Steps to Set your Ethernet Connection as Metered Connection:
1. Open Settings. To open Settings, you can press Windows Button & click on Settings Option.
2. Then click on Network & Internet option.
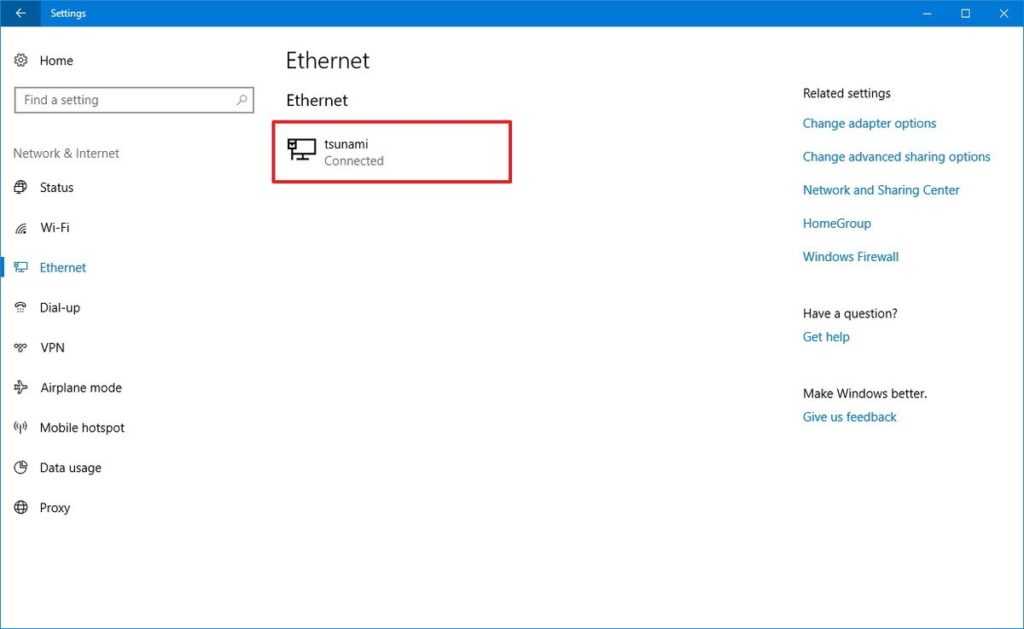
3. Now in Left Side, you see a long Menu. Find Ethernet option and just click on it.
Under Ethernet, you will find your Ethernet Connections. Select and click on your Connected Ethernet Connection.
 4. You will see your Ethernet Connection Settings Windows. You will find Metered connection Settings Section.
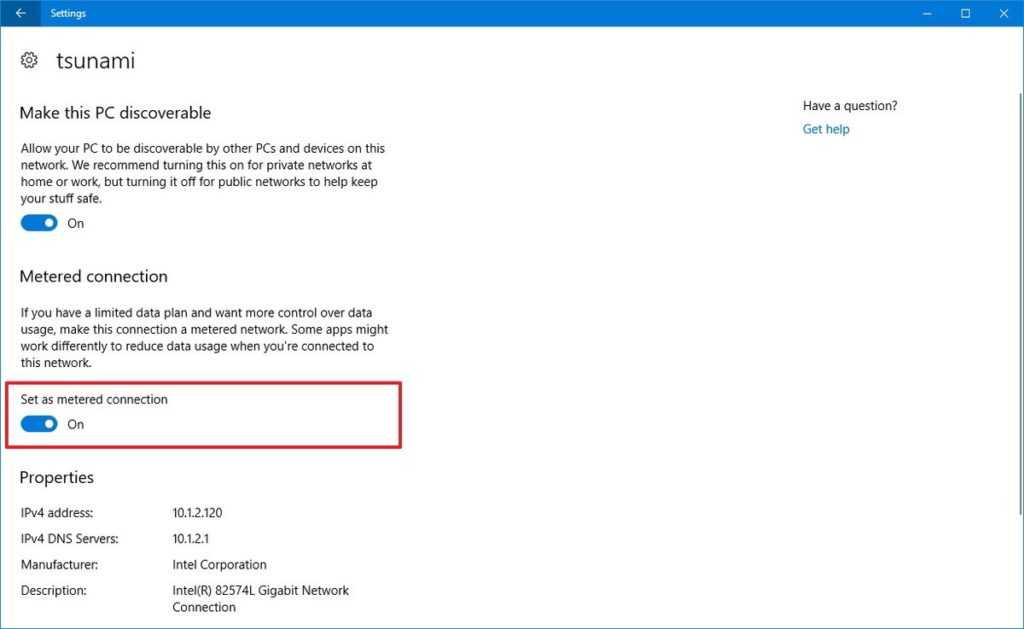
Just Turn on the Set as metered connection toggle switch. This will set your Ethernet connection to Metered. That’s it.
So using this solution, once again we got control over the brutal behaviour of the Process Service Host Local System. Hope it works for you.
Solution 4: Disable Windows Update to Permanently Stop Service Host Local System
If none of the above solutions worked for you then you may try out a special solution which will help you permanently stop Service Host Local System Process by Disabling Windows Update. Before proceeding ahead, do read the caution given below.
Here are easy steps to Disable Windows Update to Stop Service Host: Local System Permanently:
1. Open Run (Press Windows + R Key), enter services.msc and press Enter.
2. A new window with all the Services will pop-up. Just go through the list of Services and find Windows Update Service.
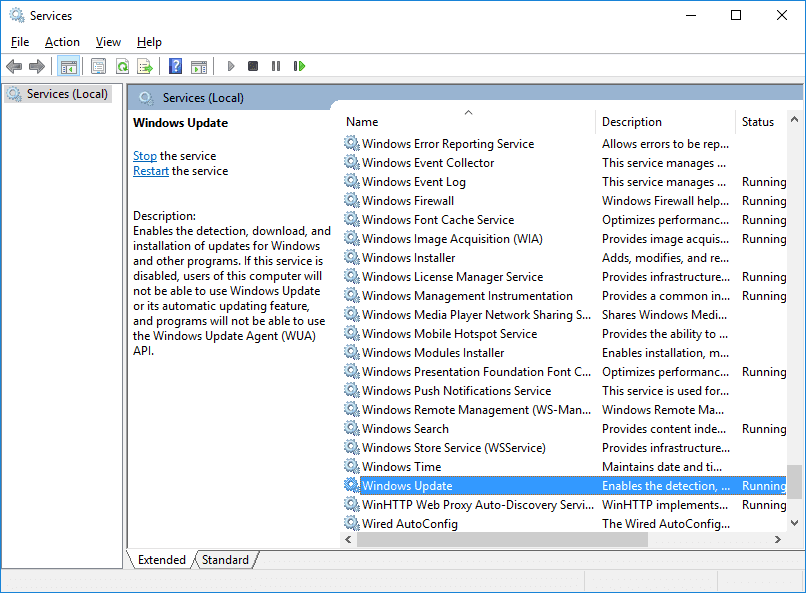
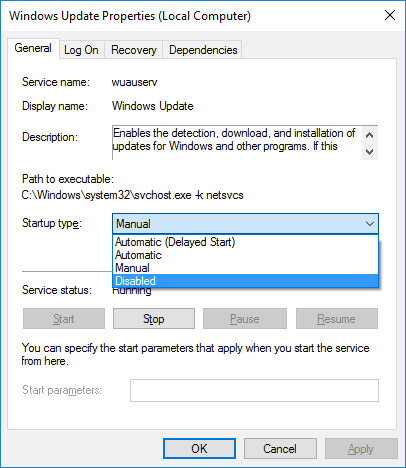
3. Double click on Windows Update service and Windows Update Service Properties Screen will pop up.
4. Now set the Startup type to Disabled. Click Apply and then Press OK.
5. That’s it. Now Windows Update Service is Disabled which means it won’t use your Network or Disk or CPU in the background. Now let’s disable Service Host Local System Process permanently.
6. Again go to the Solution 1 given above and follow it to Disable Service Host Local System directly.
So after Disabling Windows Update and then Service Host Local System Process, you will permanently solve this issue. Service Host Local System Process won’t restart again after following this Special Solution.
Caution: Use this method only if above methods don’t work. This method is to Disable Windows Update which is some times important for some drivers and software. In case if you apply this solution and need Windows Update then Turn it ON. You can turn it off when not required.
Final Words:
So, buddy, we saw total three working solutions to the problem Service Host Local System high disk usage and Service Host Local System high CPU usage by its processes. Hope these solutions work for you. If you have got any other solution or any question or query, then you can drop them in below comments. We will be very Happy to Help you Out! Thank you for visiting. Cheers!! 
Comments
Post a Comment